Skip to content

googlemailguide.com

Gmail Email : Get started ! – Google Mail

  • Home
  • About Us
  • Contact Us
  • Privacy Policy
  • Terms

Tag: gmail

How to Recover Your Gmail Username?

November 5, 2026 admin0 comment

Sometimes you to remember by heart some private information such t as you email information. It is likely that at some moments you could forget to provide some key passwords or username, for example to log in.

oogle  know how important for you to  access to your account, it provides some guidance to help you quickly recover your data. In this case we have decided to explain the how to do if you have forgotten your username is.

– Firstly, go to the Gmail page,  http://mail.google.com

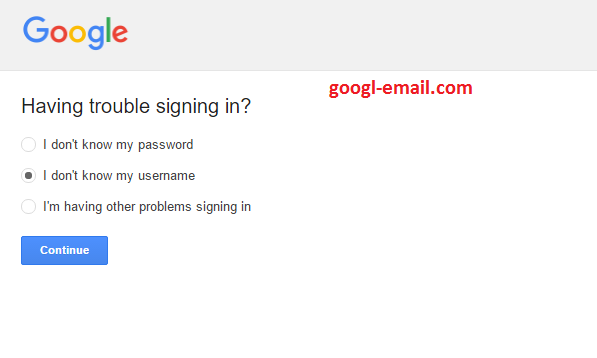
Finding the section Need help?  andchoose which of the three cases is yours, you could pick “I don’t know my username “.

You could be directed to either your recovery email address (chosen when creating the account) or the your recovery phone number.   Clarify which one is your case to a receive verification code either from your phone or your alternate email .

If none of these choices are suitable for you, you can select the option “I can not sign for other reasons” and so the company will help you as soon as possible their engineers will help in the request.


Gmail Account Managementgmail, google mail guide, How to, Recover, Username

Turn on 2-Step Verification

November 5, 2026 admin0 comment

What is the two-step verification?

To access an email account with a normal security system, simply enter your address and password. However, what happens if someone else using your password? To improve security to prevent unwanted intrusions, the “two – step verification” has been introduced by Gmail..

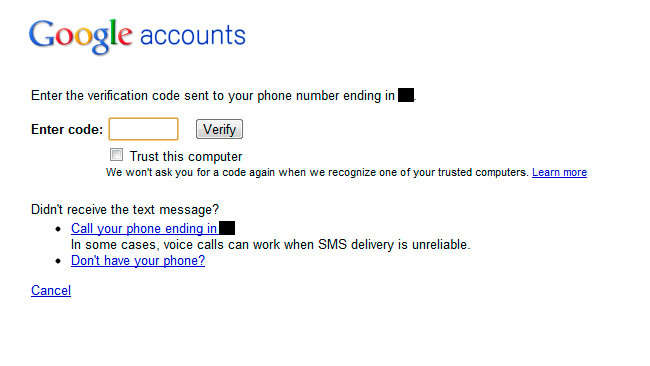
The two – step verification, as defined by Google, requires two factors: something you know (your password) and something you have, such as a code sent to your phone. In this way, you need both of them to get access. Password only is not enough. It is something similar to some online banking services that require an identification code to request a key to access the bank cards. When you log in your account, there is the following message:
Why you should enable two-step verification?

The two-step verification prevents others from accessing without permission from the user’s account if they find out the password. The attackers, guessed or otherwise, stealed your password, are unable to log in your account without user verification codes, which are sent to your mobile phone via sms.

How do I activate two-step verification?

We have seen the advantages enable two-step verification to our gmail account, now let’s see how to activate this free service.

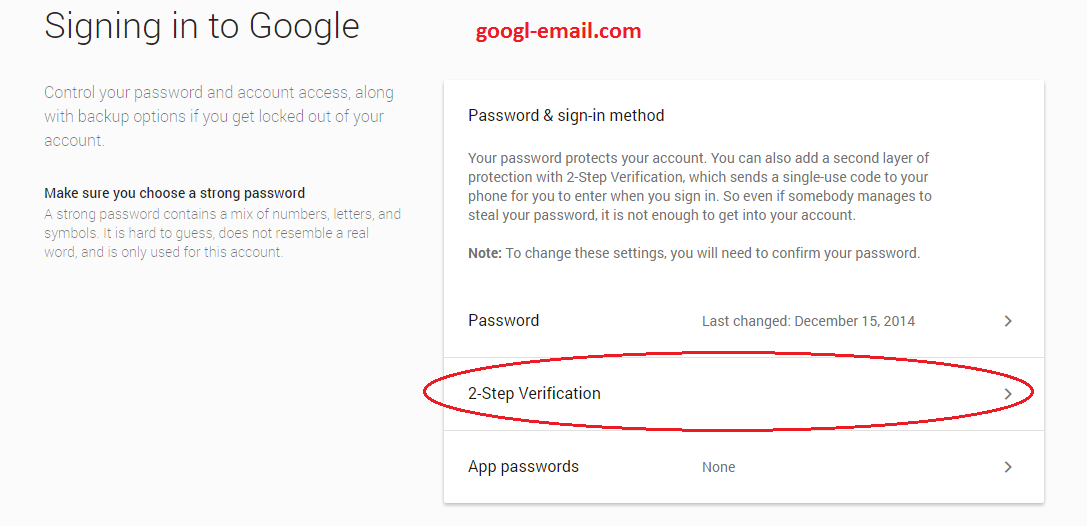
One. One. Log in your Google account in your web browser and then visit the Security settings for your Google account: https://www.google.com/settings/security/. You might have to enter the password one more time to open the settings.

Three. If it is not already selected, click Verification Codes.

Four. Under Backup Options, click Add a phone number. This is an important step should you ever need access to your account and find yourself without your YubiKey. Note that we recommend that you have a second YubiKey for backup so that you can always access your accounts – it is like you have an extra copy of your house or car keys.

Five. In the Add backup phone number dialog box, enter your phone number and specify how you want to receive codes (usually by SMS text message).

  • If you want to verify that your backup method works, click Send Code.
  • Click Save.
  • You also have backup codes that you can use to gain access to your account. This is an additional mechanism if you do not have access to your YubiKey or your phone. You might find it useful to copy these backup codes and put them in a safe place. To do this, click Show backup codes. A new browser window is opened so you can manage your backup codes.
  • Click Print or Save to text file, to save your codes.
  • In the future, if you notice you have used a few of your backup codes and you are worried about running out of them, you can return to this screen and click Generate new codes.

Six. Now you are ready to register your YubiKey as your 2-Step Verification device. Click Security Keys, and then click Manage.
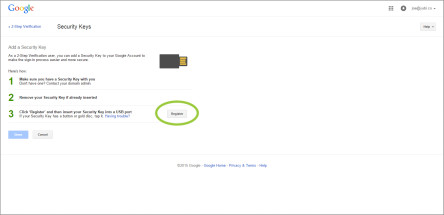
Seven. This is the really cool part! If your YubiKey is inserted, remove it. Now click Register, insert your U2F YubiKey, wait for it to blink, and tap the YubiKey button. Your YubiKey is now registered to your account as your default Two-Step Verification device!
Eight. The screen now displays all devices that are registered to your account, so you can easily add another Security Key, or remove registered keys. (If you accidentally lose a YubiKey, come here and remove that YubiKey from your account. No one could log in your account, though, because they would still need to know your password.)

What if I lose my phone?

In this case, the service offers the ability to add the phone number of a relative or friend. In an emergency, you can ask them to send a verification code to that number. It can be a number of mobile or fixed phone and not use it unless you ask.

Security codes printable

If our phone is not available, we could only log in the account with these codes. You can store them in a place you can easily access, such as your wallet.
 

Gmail Account Managementgmail, google mail guide, two-step verification

Sign in to Gmail – Gmail iPhone/iPad app

November 5, 2026November 5, 2026 admin0 comment

Gmail for iOS App

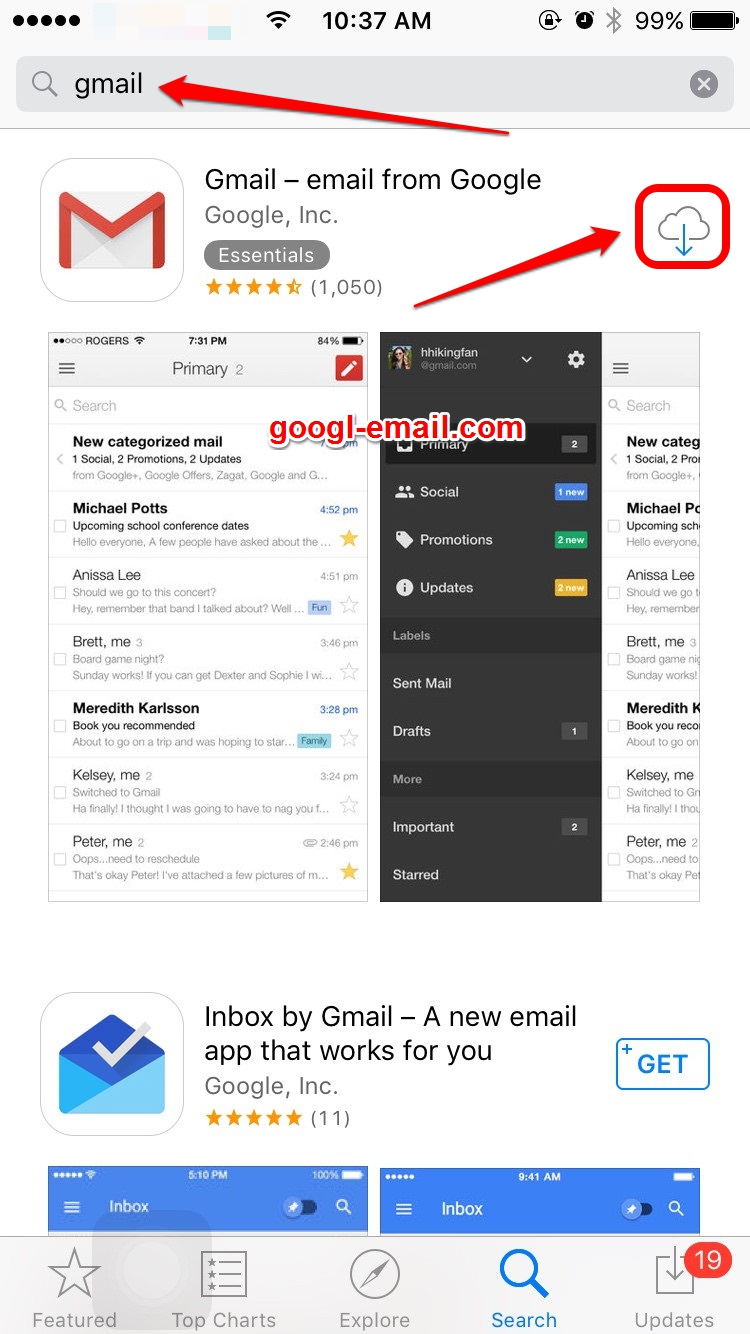
STEP 1 : Open the App Store on your iPhone or iPad. You can install the Gmail app for free on your iOS device by using the App store.

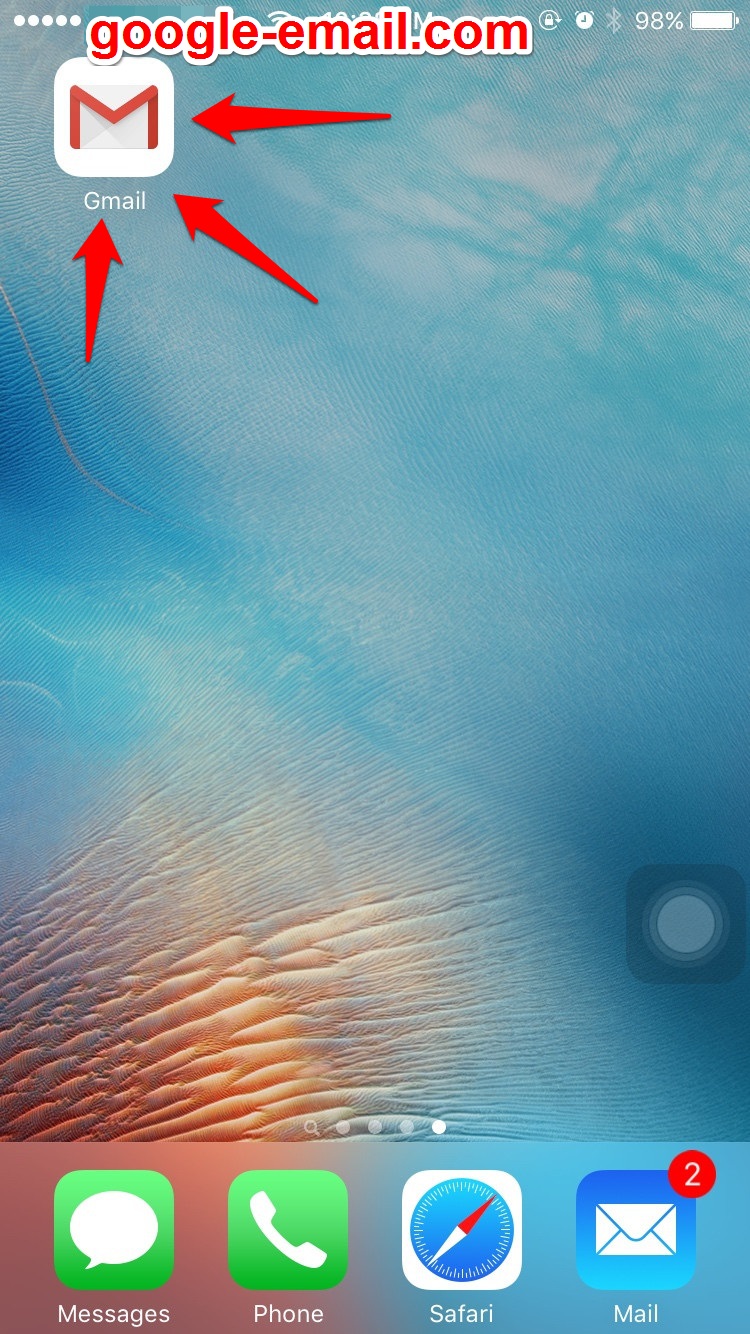
STEP 2 : Tap the Gmail app on the home screen to launch Gmail.

STEP 3 : Enter your Gmail username and password to sign in.

Once your password is registered, you’ll have the opportunity to view a short tour of the Gmail app. If you want the tour, tap “Start Tour.”

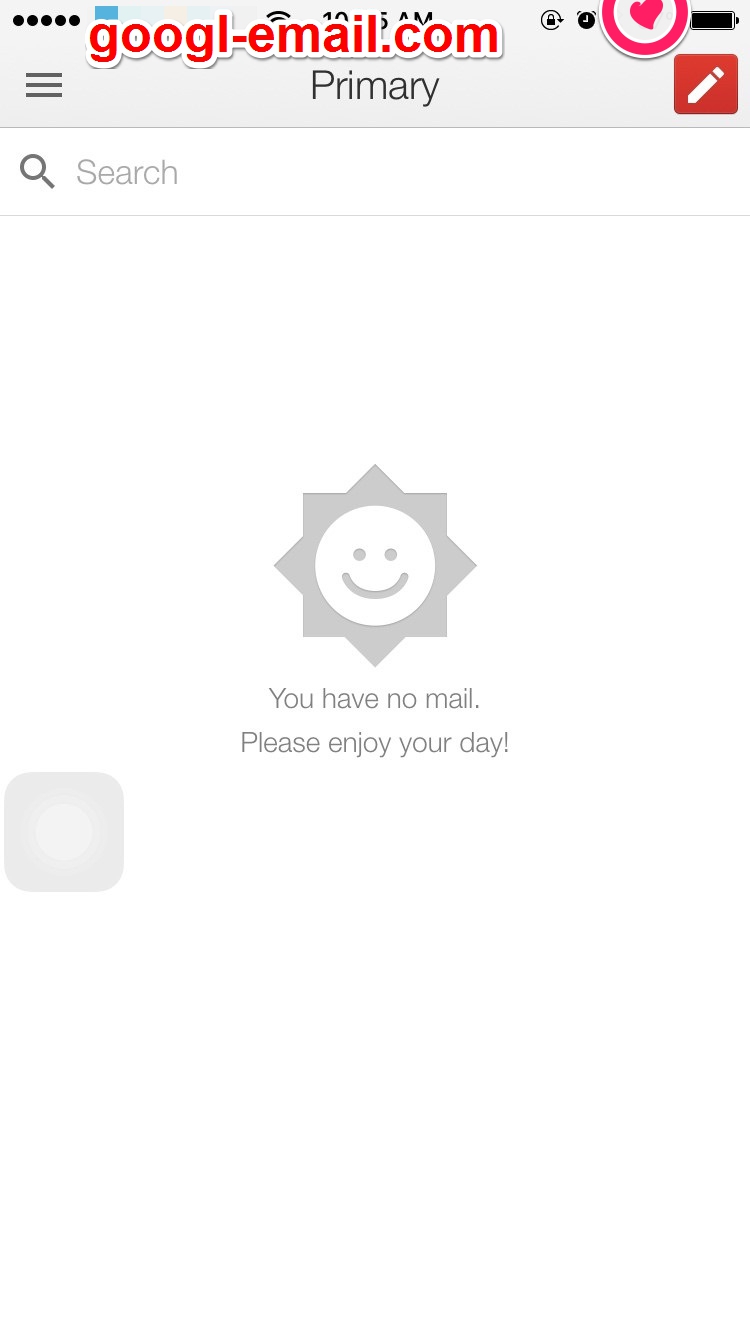
STEP 4 : Tap “Go to inbox” to view your inbox. You now have access to your Gmail account on your iOS device.

Built-In iOS Mail

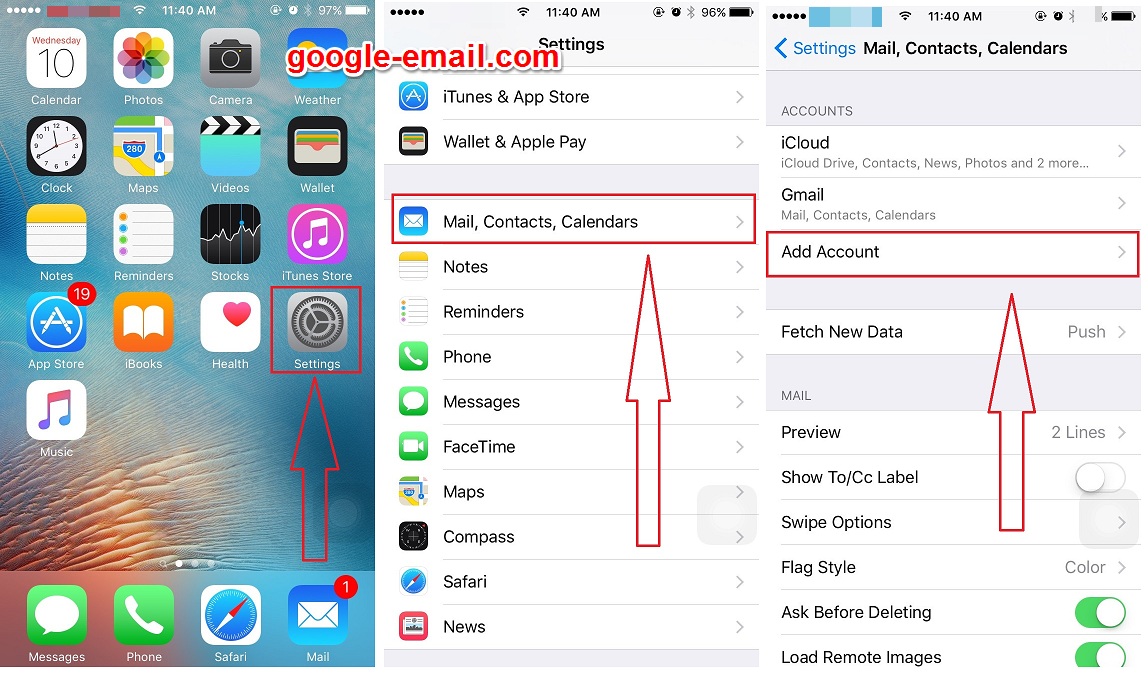
If you want to add your Google account to your iPhone or iPad’s system apps, you’ll want to go to Settings > Mail, Calendar, Contacts.

Under the hood, Apple is using the open standard IMAP, CalDAV, and CardDAV services to handle syncing Google services; unfortunately, Gmail retro-fitted support for IMAP, and it can be quirky at times—especially if you like Gmail’s labeling system.

If you want to use the built-in iOS Mail app and its unified inbox, however, and you don’t have a paid account, it’s your only option.

  1. Launch the Settings app from your Home screen.
  2. Tap on Mail, Contacts, Calendars
  3. Tap on Add Account.
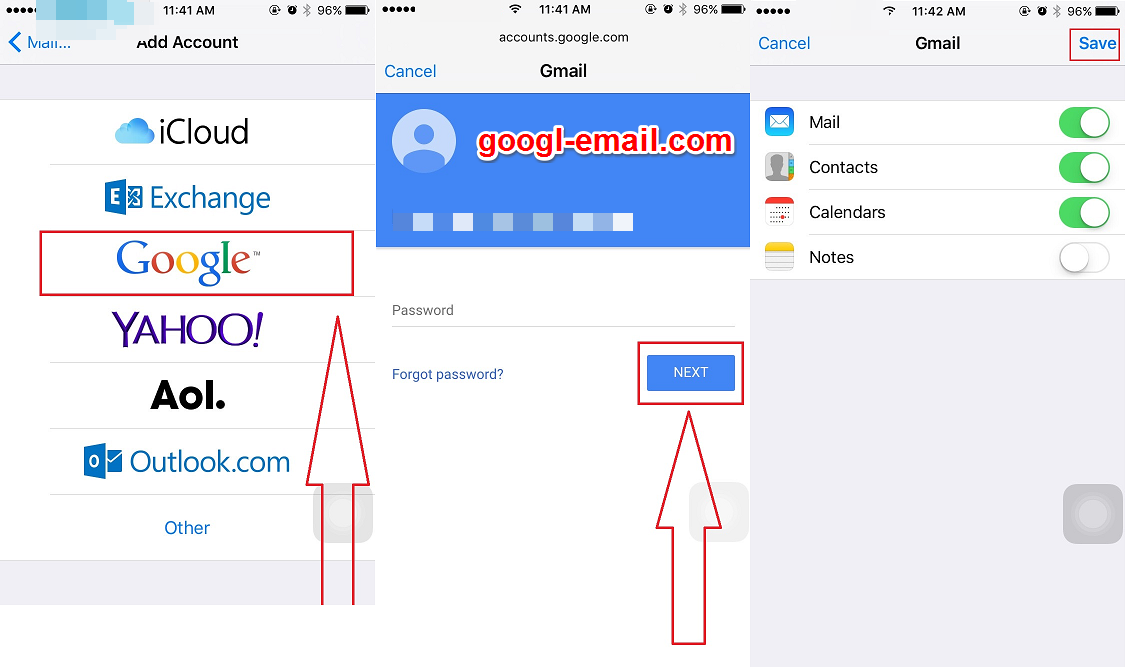
  4. Tap on Gmail.
  5. Enter your login information for your Google account.
  6. Tap on Allow when prompted with the “iOS would like to…” screen.
  7. Tap on the Gmail button.
  8. Under the account heading you can choose which services you’d like to sync: Mail, Contacts, Calendars, or Notes by moving the corresponding slider to the right.
  9. Tap on Save.


Google Mail, Sign in to Gmailgmail, Gmail app, google account, google mail guide, ipad, iphone

Top Posts & Pages

  • Gmail Sign In
  • Google Mail
  • Google Mail vs. Gmail

Archives

  • November 2026
  • October 2026
  • February 2026

Categories

  • Gmail Account Management
  • Google Mail
  • Sign in to Gmail

Subscribe to Blog via Email

Enter your email address to subscribe to this blog and receive notifications of new posts by email.

Join 1 other subscriber

Blog Stats

  • 816 hits
  • Home
  • About Us
  • Contact Us
  • Privacy Policy
  • Terms
Copyright © All Rights Reserved. This is not an official site, we are only helping with our tutorials to access mail servers. We are not affiliated with or sponsored by Google Inc.
Powered by WordPress | Blue Planet by Nilambar
Go to top